Downscaling Arduino Projects to a ATTINY85
Making your Arduino projects 100x smaller
Rationale
Just like the ATMEGA328P, this project was part of an even bigger project. The ATTINY85 is a small and cheap (About 1.5 to 2 USD) MCU with 8 pins, 2 of which for power. If you intend to use more components which require more than 6 pins, I suggest you either switch to the ATTINY84 (14 pins) or ATMEGA328P. Previously, I already wrote a guide for the ATMEGA328P. If you have read the ATMEGA328P guide, you’d be glad to know this one is much easier.
Do note the ATTINY85 is meant for really small projects where not much SRAM is required.
Requirements
- Arduino Uno
- ATTINY85
- Wires (Either use jumper wires or solid core hookup wires which require wire strippers, pliers and cutters)
- Breadboard
- 10 uF capacitor
- LED (For testing)
- Arduino IDE
Setting Up Your Uno
Using the standard programming settings for an Uno (table below), upload the example ArduinoISP code. The ArduinoISP code can be found under File > Examples > ArduinoISP > ArduinoISP
| Tools | Setting |
|---|---|
| Board | Arduino Uno |
| Programmer | AVRISP mkll |
This code should upload just like any other program (ctrl-U to upload).
Wiring
Below is the pinout for the ATTINY85. Note that pin 1 is denoted by a small dot indentation on your ATTINY85.
Let’s connect the ATTINY85 to our breadboard. Wire as per following
| Arduino Uno Pin | ATTINY85 Pin |
|---|---|
| 5V | 8 |
| GND | 4 |
| D10 | 1 (Reset) |
| D11 | 5 |
| D12 | 6 |
| D13 | 7 |
IMPORTANT: In addition, connect a 10uF capacitor from GND to RESET on your Uno to ensure the Uno does not reset when uploading to the ATTINY85. If you are using an electrolytic capacitor, ensure the negative side is connected to GND.
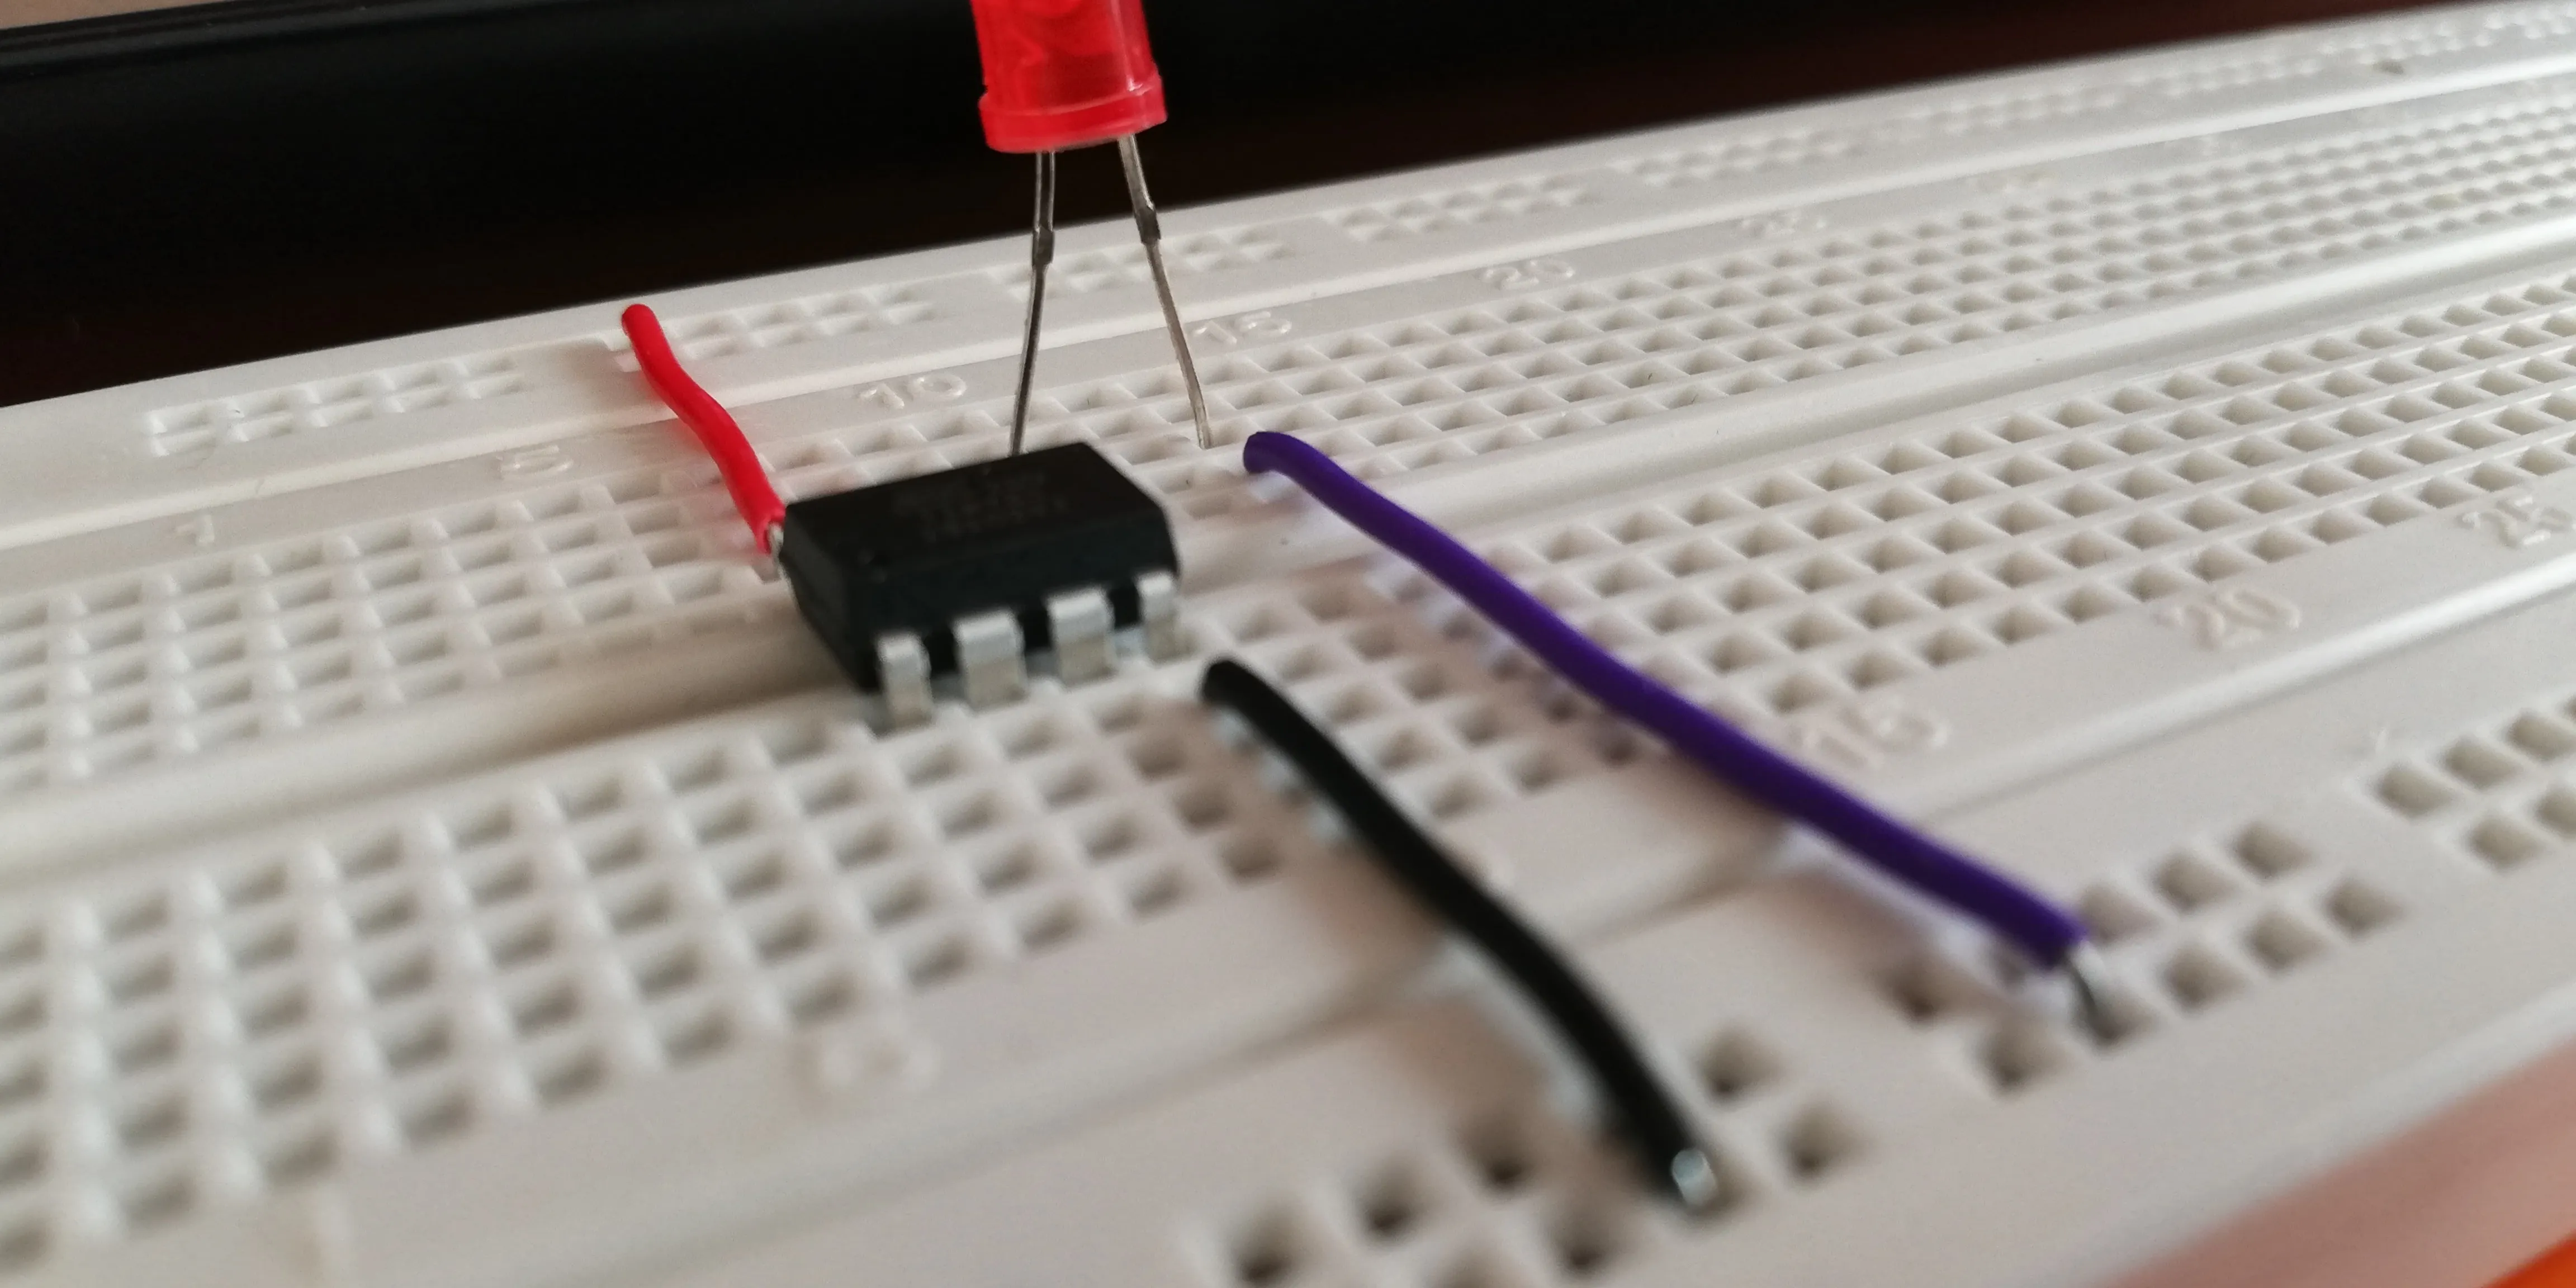
My setup with very terrible wiring can be found below. You may choose to use another power source instead of the 5V and GND from the Uno but that’s up to you.

Burn the Bootloader
Now we need to add the ATTINY85 board to our Arduino IDE. Go to File > Preferences or ctrl-,. Under Additional Board Manager URLs paste the following link:
Edit: I found a generally more versatile and feature-rich core library from https://github.com/SpenceKonde/ATTinyCore. The board manager URL to add is http://drazzy.com/package_drazzy.com_index.json
If you had other URLs in the textbox, append the link with a comma separating the links. After you’re done, click OK and restart your IDE.
Set the following settings under Tools:
| Tools | Setting |
|---|---|
| Board | ATtiny25/45/85 |
| Processor | ATtiny85 |
| Clock | Internal 8 MHz |
| Programmer | Arduino as ISP |
If everything is setup properly, Tools > Burn Bootloader should not give you any errors.
Uploading Code
We can now upload basic Arduino code using the same setup. Copy paste the modified blink code below which uses port 0 instead of LED_BUILTIN.
void setup() {
  pinMode(0, OUTPUT);
}

void loop() {
  digitalWrite(0, HIGH);
  delay(1000);
  digitalWrite(0, LOW);
  delay(1000);
}
Upload the code to the ATTINY85.
Testing
You can now disconnect all wires except the 5V and GND line. Connect the positive LED pin to pin 5 on the ATTINY85 (example below) and the GND pin of the LED to GND. Alternatively, you can test it is working by connecting the red pin of the multimeter to the pin 14 (last pin on the same row as pin 1) and the black pin of the multimeter to GND. Watch as the voltage increases and decreases.

To confirm it is definitely working, you can change the delays and re-upload the code.
Conclusion
So that is how we can minimize the size of our Arduino projects using the ATTINY85. In case my guide was not clear enough for you, you could use a number of guides. However, do note that some of these guides may not include the part about uploading the ArduinoISP code to the Uno first. My resources for said guides are found below.
Moving Forward
Now you probably want to have Serial output to print your favourite “Hello World” program. As the ATTINY85 does not have hardware Serial ports, you have to use the SoftwareSerial library. I also have a tutorial to connect the ATTINY85 to the Arduino Serial Monitor
Resources
https://create.arduino.cc/projecthub/arjun/programming-attiny85-with-arduino-uno-afb829
http://highlowtech.org/?p=1695